
What is Jira?
Jira is a powerful platform for managing projects and workflows, and it offers various customization options through apps and extensions. In this blog post, we’ll explore the concept of Triggers, Web Triggers and Scheduled Triggers in Jira using the manifest.yml file as a reference.
What is manifest.yml?
The manifest.yml file is a crucial configuration file for Forge, which is Atlassian’s new development platform for building Jira and Confluence Cloud apps. Think of this file as the master plan or blueprint that defines how your application functions within its environment. It defines various aspects of your app, including its modules, resources, permissions and functions. In our discussion, we’ll focus on the Trigger, Web Triggers and Scheduled Trigger sections of the manifest.yml file.
Purpose of manifest.yml:
Configuration Details : It contains essential metadata about your application, such as its name, version, description and other key details.
Component Definitions : Specifies various components, functionalities or modules your app provides within the platform. This might include pages, resources, functions or permissions needed for your app to operate seamlessly.
Resource Allocation : Defines resources, paths or locations required by your application, like where to find static files, data sources or configurations.
Identification : Provides a unique identifier for your app within the ecosystem or platform, ensuring it can be recognized and managed effectively.
Triggers are event-driven actions that respond to specific occurrences within the Jira platform, it allows apps to react to changes or events in Jira, streamline processes and enhance productivity.
Web Triggers are endpoints configured to respond to incoming HTTP requests, enabling external systems to interact with Jira. These triggers facilitate seamless communication between Jira and external applications, allowing for real-time updates and automated actions triggered by external events.
Scheduled Triggers are automated routines within the platform that execute tasks at predefined intervals, enabling regular, scheduled actions or updates. These triggers facilitate periodic processes such as data syncing or cleanup, enhancing system maintenance and efficiency within Jira.
Steps to create an app:
When creating an app in Jira, the manifest.yml file is automatically generated.
1. Install the Forge CLI
npm install -g @forge/cli

2. Create or use an existing Atlassian API token to log in to the CLI. The CLI uses your token when running commands
Steps to create an API token:
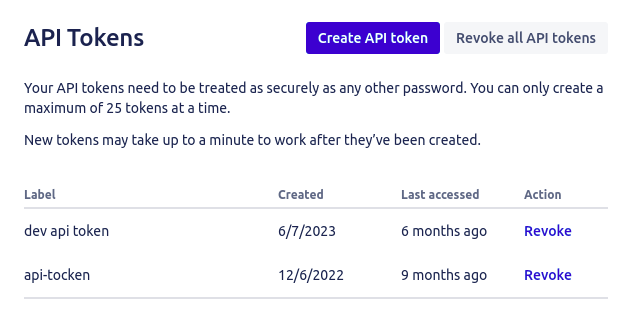
- Click Create API token
- Enter a label to describe your API token. For example, dev-api-token
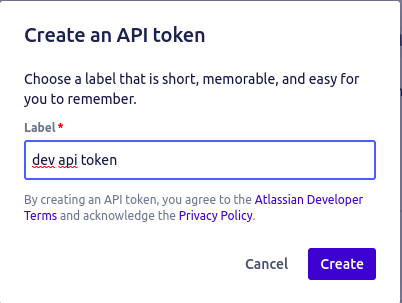
- Click Create
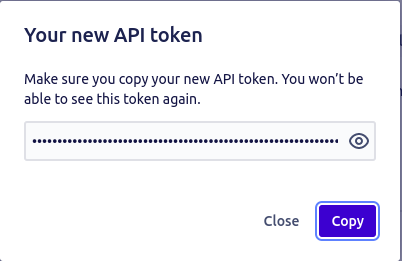
- Click Copy and close the dialog
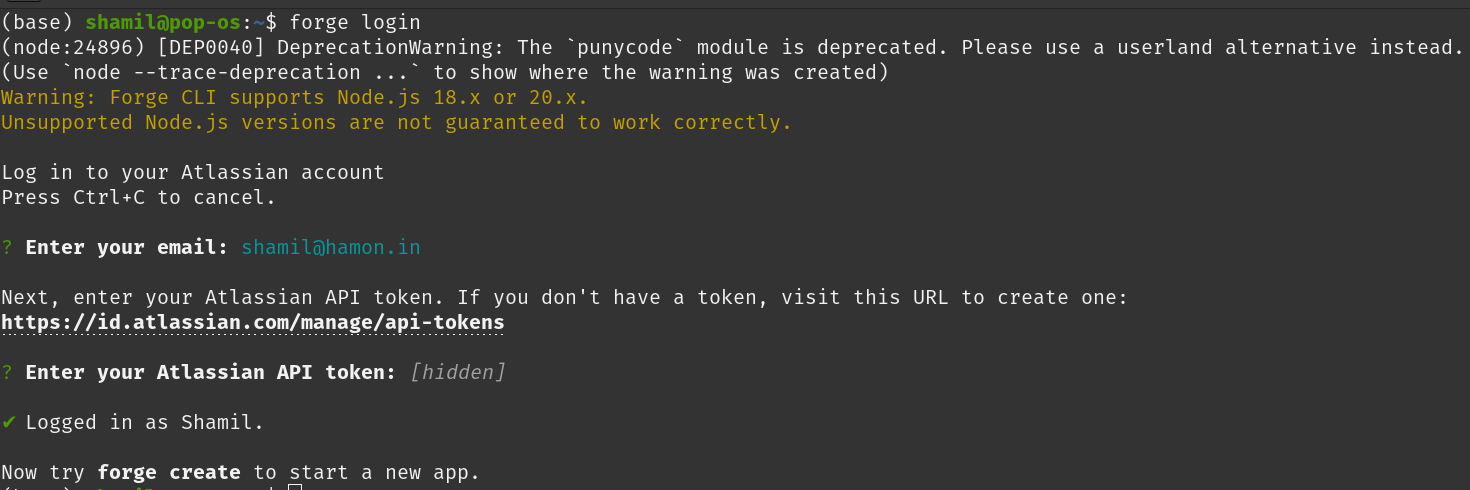
3. Log in to the Forge CLI to start using Forge commands
forge login- On prompt enter your email and your API token
4. Navigate to the directory where you want to create the app
cd <your directory>
5. Create your app by running
forge create- Enter a name for your app (up to 50 characters). For example, documentation-app
- Select Custom UI
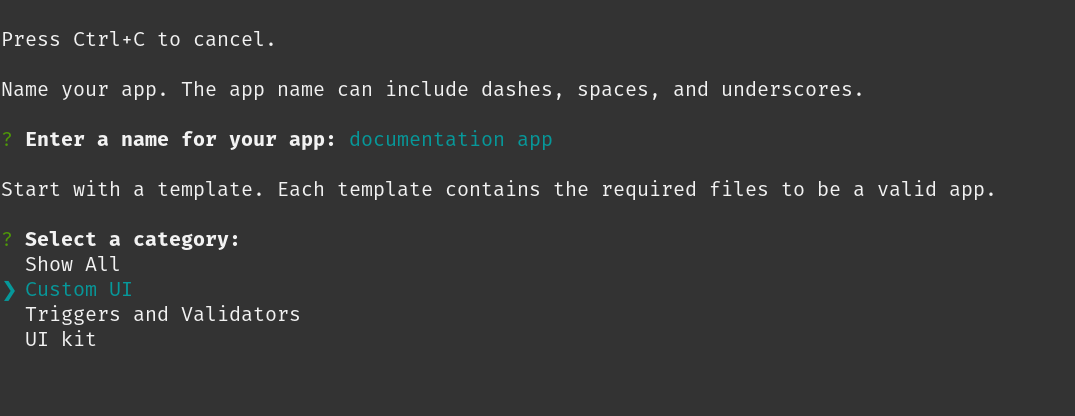
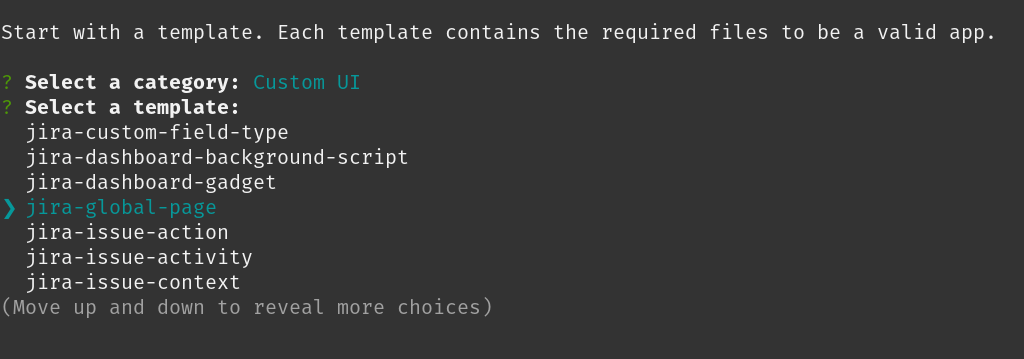
- Select jira-global-page template
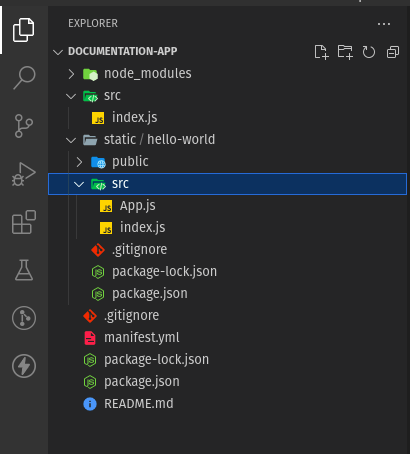
- A new sub directory with the app’s name will be automatically created there
- Change to the app sub directory to see the app files
cd documentation-app
This will create a folder structure like this
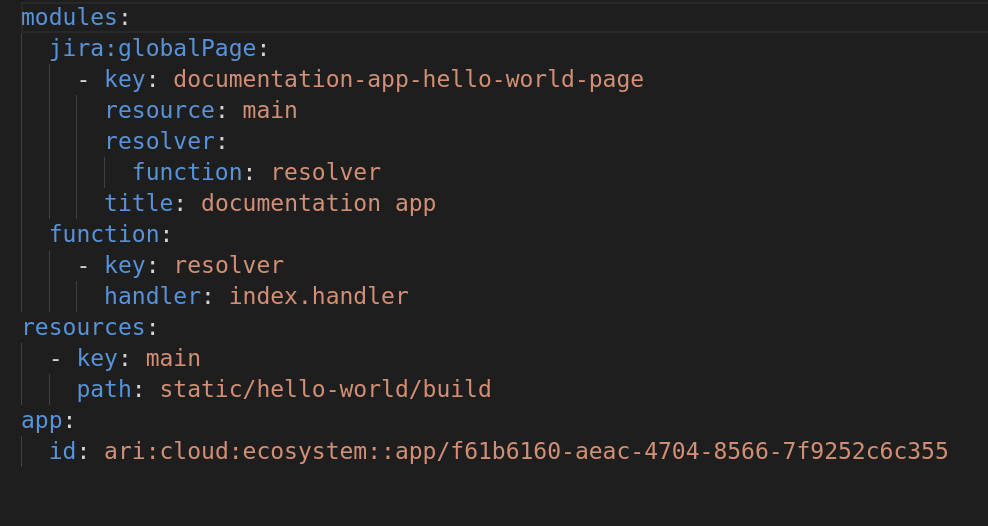
and the auto-generated manifest.yml will look like this
Role of Triggers in Jira
Triggers are useful for invoking custom app functions when specific events occur in Jira. It plays a vital role in customizing and automating Jira apps. They allow developers to respond to specific events by executing associated functions.
Triggers
modules:
  jira:globalPage:
    - key: blog-app-hello-world-page
      resource: main
      resolver:
        function: resolver
      title: blog app
      layout: blank
  trigger:
    - key: lifecycle-trigger
      events:
        - 'avi:forge:installed:app'
        - 'avi:jira:created:issue'
        - 'avi:jira:updated:issue'
        - 'avi:jira:assigned:issue'
        - 'avi:jira:viewed:issue'
        - 'avi:jira:mentioned:issue'
      function: lifecycle-trigger-func
  webtrigger:
    - key: issue-adder
      function: issue-adder-runner
    - key: scheduled-trigger
      function: schedule-runner
  scheduledTrigger:
    - key: scheduler
      function: schedule-runner
      interval: hour
  function:
    - key: resolver
      handler: index.handler
    - key: lifecycle-trigger-func
      handler: lifecycle.EventHandler
    - key: issue-adder-runner
      handler: webTrigger.runner
    - key: schedule-runner
      handler: webTrigger.scheduledTrigger
resources:
  - key: main
    path: static/hello-world/build
app:
  id: ari:cloud:ecosystem::app/a909a987-941f-750c-a6b4-7c945ae08310
Consider the above manifest.yml file, here I have defined a trigger with a key as lifecycle-trigger and function as lifecycle-trigger-func .This trigger is designed to respond to various events listed under events, like app installation (avi:forge:installed:app) and Jira issue-related events (avi:jira:assigned:issue avi:jira:updated:issue avi:jira:created:issue avi:jira:viewed:issue avi:jira:mentioned:issue). When these events occur, the associated function lifecycle-trigger-func within the function section will be executed and it will look for the handler which is lifecycle.EventHandler. In order to do this, we need this EventHandler function in src/lifecycle.js.
export async function EventHandler(req) {
  switch (req.eventType) {
    case 'avi:forge:installed:app':
      await handleAppInstall(req);
      break;
    case 'avi:jira:created:issue':
      await issueCreatedTrigger(req);
      break;
    case 'avi:jira:updated:issue':
      await updatedTrigger(req);
      break;
    case 'avi:jira:assigned:issue':
      await issueAssignedTrigger(req);
      break;
    case 'avi:jira:viewed:issue':
      await issueViewedTrigger(req);
      break;
    case 'avi:jira:mentioned:issue':
      await issueMentionedTrigger(req);
      break;
    default:
      console.log(req.eventType);
      break;
  }
}
Web Trigger
Web triggers are mechanisms for executing functions in response to specific HTTP requests made to your app. In the above manifest.yml file, I’ve defined two web triggers: issue-adder and scheduled-trigger. Each web trigger is associated with a corresponding function: issue-adder- runner and schedule-runner.
These web triggers allow your app to be integrated with external systems or services by triggering functions based on incoming web requests. For example, the issue-adder web trigger could be used to add new issues to Jira when a specific HTTP request is received and the request is sent to the webtrigger URL with the JSON payload. This web trigger URL can be accessed using forge CLI command forge webtrigger since I have added ‘webtrigger’ in the above manifest.yml
💡 example trigger url https://a800a948-921f-450b-a9a4-7d987ea08619.hello.atlassian-dev.net/x1/RZn7_W1fidWNXyWwKR6w7v6NbIk

**can be used like:**
`curl -X POST \
    -H "Content-Type: application/json"
    -d '{
          "issue_key": "your_epic_id",
          "key": "epic_completed"
      }' \
    https://a909a987-941f-750c-a6b4-7c945ae08310.hello.atlassian-dev.net/x1/RZn7_W1fidWNXyWwKR6w7v6NbIk`
Scheduled Trigger
Scheduled triggers are a way to automate tasks at defined intervals. In this manifest.yml file, I’ve defined a scheduled trigger with the key scheduler that runs the schedule-runner function at an hourly interval. This is particularly useful for performing routine tasks or updates without manual intervention.
For example, you could use a scheduled trigger to generate daily reports or perform data cleanup tasks regularly.
Conclusion
In this blog post, we’ve explored the concepts of triggers, web triggers and scheduled triggers in Jira using the manifest.yml file as a reference. These mechanisms provide powerful ways to customize and automate your Jira app, enhancing its functionality and improving your project management workflow.
By harnessing the capabilities of triggers, web triggers and scheduled triggers, you can create more efficient and responsive Jira app that meets the specific needs of your project and users.
 2026 Hamon Technologies Inc