
Prerequisites
- Familiarity with the Solidity programming language is required for developing smart contracts.
- Knowledge of the Ethereum and how it processes transactions.
- Understanding of gas concepts. (Gas is a measure of the computational effort required to execute a given operation on the EVM, and is paid for in Ether (ETH). The cost of gas can vary depending on the complexity of the contract and the current demand on the network.)
- Understanding of how to use development tools like Metamask, Truffle and Ganache to test and deploy contracts locally.
ERC721 is a standard for non-fungible tokens (NFTs) on the Ethereum blockchain. Non-fungible tokens are unique digital assets that cannot be exchanged for other tokens or assets on a one-to-one basis. They are often used to represent things like digital art, collectibles, and game items.
Before we begin, make sure you have the following tools installed on your computer:
- Node.js: This is a JavaScript runtime that allows you to run JavaScript code on your computer. You can download it from the official website (https://nodejs.org/en/). I am using node version 16
- npm (Node Package Manager): This is a package manager for Node.js. It allows you to easily install and manage packages (i.e., libraries or modules) that you can use in your JavaScript projects. npm is installed automatically when you install Node.js.
With these tools installed, let’s start by installing Truffle. Open a terminal and run the following command:
npm install -g truffleThis will install Truffle globally on your computer, allowing you to use it from any directory. Once Truffle is installed, we can set up a new project. Create a new directory for your project , name it as MyToken, navigate to it in the terminal, and run the following commands:
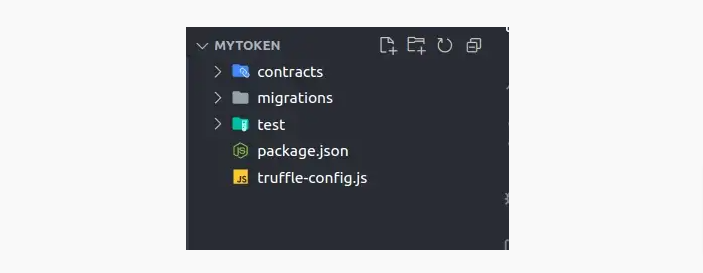
npm init -ytruffle initThis will create a package.json file, truffle-config.js file, and contracts/,migrations/, test/ directories in your project. In this project, truffle-config.js acts as the index file, just like index.js in node projects. Thus in package.json file, index.js should be replaced with truffle-config.js for “main” key. An example of folder structure is as follows:
Install these dependencies to our project directory:
npm install @openzeppelin/contracts-upgradeablenpm install @truffle/hdwallet-providernpm install dotenv npm install --save-dev @openzeppelin/truffle-upgradesNext we need to write our smart contract. Create a new file called MyToken.sol in the contracts/ directory. Our sample contract called MyToken looks like this:
// SPDX-License-Identifier: MIT
pragma solidity ^0.8.10;

import "@openzeppelin/contracts-upgradeable/token/ERC721/ERC721Upgradeable.sol";
import "@openzeppelin/contracts-upgradeable/access/OwnableUpgradeable.sol";
import "@openzeppelin/contracts-upgradeable/proxy/utils/Initializable.sol";
import "@openzeppelin/contracts-upgradeable/proxy/utils/UUPSUpgradeable.sol";

contract MyToken is
 Initializable,
 ERC721Upgradeable,
 OwnableUpgradeable,
 UUPSUpgradeable
{
 function initialize() public initializer {
 __ERC721_init("MyToken", "MTK");
 __Ownable_init();
 __UUPSUpgradeable_init();
 }

 function safeMint(address _to, uint256 _tokenId) public onlyOwner {
 _safeMint(_to, _tokenId);
 }

 function _authorizeUpgrade(address _newImplementation)
 internal
 override
 onlyOwner
 {}
}
In truffle-config.js, add the following snippet :
const HDWalletProvider = require('@truffle/hdwallet-provider');
const fs = require('fs');
require('dotenv').config({
 path: '.env',
});

var mnemonic = fs.readFileSync('.secret.development').toString().trim();
var build_directory = './build-dev/contracts';

module.exports = {
 networks: {
 development: {
 host: '127.0.0.1',
 port: 8545,
 network_id: '*',
 },
 goerli_testnet: {
 provider: () =>
 new HDWalletProvider(
 mnemonic,
 `https://eth-goerli.g.alchemy.com/v2/YOUR_API_KEY`
 ),
 network_id: 5,
 confirmations: 2,
 timeoutBlocks: 200,
 skipDryRun: true,
 timeout: 5000,
 },
 },
 compilers: {
 solc: {
 version: '0.8.10',
 settings: {
 optimizer: {
 enabled: true,
 runs: 1000,
 },
 },
 },
 },

 contracts_build_directory: build_directory,
};
Make sure to replace YOUR_API_KEY and mnemonic with yours. For mnemonic, add your private key (from Metamask) to a file named .secret.development and don’t forget to add this file to .gitignore . After adding, run this command :
truffle compile --allOur contract’s ABI file will be generated in a new directory build-dev. ABIs are application binary interfaces. They define the methods and variables that are available in a smart contract and which we can use to interact with that smart contract.
Next, we’ll create a migration file in the migrations/directory called 1_initial_migration.js. Add the following snippets into your migration file:
const { deployProxy } = require('@openzeppelin/truffle-upgrades');

const MyToken = artifacts.require('MyToken');

module.exports = async function (deployer) {
 await deployProxy(MyToken, {
 deployer,
 kind: 'uups',
 });
};
Our contract should have test cases next. For that inside our tests/ directory, create a file called MyToken.test.js . This file looks like:
const { deployProxy } = require('@openzeppelin/truffle-upgrades');

const MyToken = artifacts.require('MyToken.sol');

contract('MyToken', function (accounts) {
 beforeEach(async function () {
 //Deploy a new contract for each test
 this.factory = await deployProxy(MyToken, {
 kind: 'uups',
 });
 this.userOne = accounts[1];
 });

 it('Successful: Minting', async function () {
 // userOne balance should be zero before minting
 var userOneBalance = await this.factory.balanceOf(this.userOne);
 assert.equal(userOneBalance, 0);

 // Mint tokenId 1 to userOne
 await this.factory.safeMint(this.userOne, 1);

 // userOne balance should not be zero after minting
 userOneBalance = await this.factory.balanceOf(this.userOne);
 assert.equal(userOneBalance, 1);
 });
});
Install a local Ethereum network: You will need a local Ethereum network to test your contract. You can use tools like Ganache or ganache-cli to set up a local Ethereum network on your machine. To install run this comand
npm install -g ganacheOpen two terminals and run the following commands on one of them:
ganacheRun this command on the other terminal:
truffle test test/MyToken.test.jsIf all of our test cases are passing, output should look like:
 Contract: MyToken
 ✔ Successful: Minting (131ms)


 1 passing (321ms)
With ctl+c, we can shut down the ganache once testing is complete.
Prior to starting migration, ensure you have enough goerli test ethers in your account since migration requires some amount as gas. You can get it from here.
Once our test cases are passing, we’re good to go. Since we have already configured our truffle-config.js and 1_initial_migration.js, run this command :
truffle migrate --network goerli_testnetThis is how the output looks:
Compiling your contracts...
===========================
> Everything is up to date, there is nothing to compile.


Starting migrations...
======================
> Network name: 'goerli_testnet'
> Network id: 5
> Block gas limit: 30000000 (0x1c9c380)


1_initial_migration.js
======================

 Deploying 'MyToken'
 -------------------
 > transaction hash: 0x61c049f1ffef6429a45c235eced73eb2a66176f9b7b2a77315b8564ca538e6d3
 > Blocks: 1 Seconds: 10
 > contract address: 0x16e876F6Ea4737AF03022A82a4a684989aB151D0
 > block number: 8231576
 > block timestamp: 1672474488
 > account: 0x3738d816E3D630C42Ca337278f40446343E8FFAb
 > balance: 1.689119818493581037
 > gas used: 2147609 (0x20c519)
 > gas price: 2.500000009 gwei
 > value sent: 0 ETH
 > total cost: 0.005369022519328481 ETH

 Pausing for 2 confirmations...

 -------------------------------
 > confirmation number: 1 (block: 8231577)
 > confirmation number: 2 (block: 8231578)

 Deploying 'ERC1967Proxy'
 ------------------------
 > transaction hash: 0x0cc67bafe88cdcec68357c5d9e9500626a188a80406fc8cb675cb85a7dd040f3
 > Blocks: 2 Seconds: 21
 > contract address: 0xdD743626C508d08578842BC8FF0Bd00497fA76b5
 > block number: 8231580
 > block timestamp: 1672474536
 > account: 0x3738d816E3D630C42Ca337278f40446343E8FFAb
 > balance: 1.688266153490507843
 > gas used: 341466 (0x535da)
 > gas price: 2.500000009 gwei
 > value sent: 0 ETH
 > total cost: 0.000853665003073194 ETH

 Pausing for 2 confirmations...

 -------------------------------
 > confirmation number: 1 (block: 8231581)
 > confirmation number: 2 (block: 8231582)
 > Saving artifacts
 -------------------------------------
 > Total cost: 0.006222687522401675 ETH

Summary
=======
> Total deployments: 2
> Final cost: 0.006222687522401675 ETH
Here we can see two transactions are taking place.
- The first transaction is to deploy the initial version of the smart contract to the blockchain. This transaction creates a new contract on the blockchain and sets the contract’s code and storage.
- The second transaction is to create a new contract instance that points to the initial contract. This is called a “proxy contract,” and it is used to manage upgrades to the initial contract. The proxy contract stores the address of the initial contract and forwards calls to it. When you want to upgrade the contract, you can simply update the proxy contract to point to a new implementation of the contract, and all calls to the contract will be forwarded to the new implementation.
We have now deployed our MyToken contract to Goerli testnet. You can check this by visiting goerli.etherscan
Let’s say you want to make changes to the contract. After making changes to the contract, you must compile the contract and run the unit tests again. Once these two steps are over, create yet another file named 2_upgrade_MyToken.js, inside migrations/ directory. Upgradation file looks like:
const { upgradeProxy } = require('@openzeppelin/truffle-upgrades');

const MTK = artifacts.require('MyToken');

module.exports = async function (deployer, network, accounts) {
 const mtk = await MTK.deployed();
 console.log('Existing', mtk.address);
 await upgradeProxy(mtk.address, MTK, {
 deployer,
 kind: 'uups',
 });
 console.log('Upgraded');
};
Run this command:
truffle migrate -f 2 --network goerli_testnetAs long as the contract works as expected after the changes have been made, you can consider the upgradation as successful.
Lastly, to communicate with the deployed contract, create a new directory called scripts/ and add necessary scripts, then run the following command:
truffle exec scripts/<file_name>.js --network goerli_testnetIn this article, we have covered the process of creating a simple ERC721 upgradeable contract with minting functionality, testing our contract using truffle suit, deploying the contract into Goerli test network and upgrading the deployed contract.
Thanks for reading, See you next time. Bye!
 2026 Hamon Technologies Inc