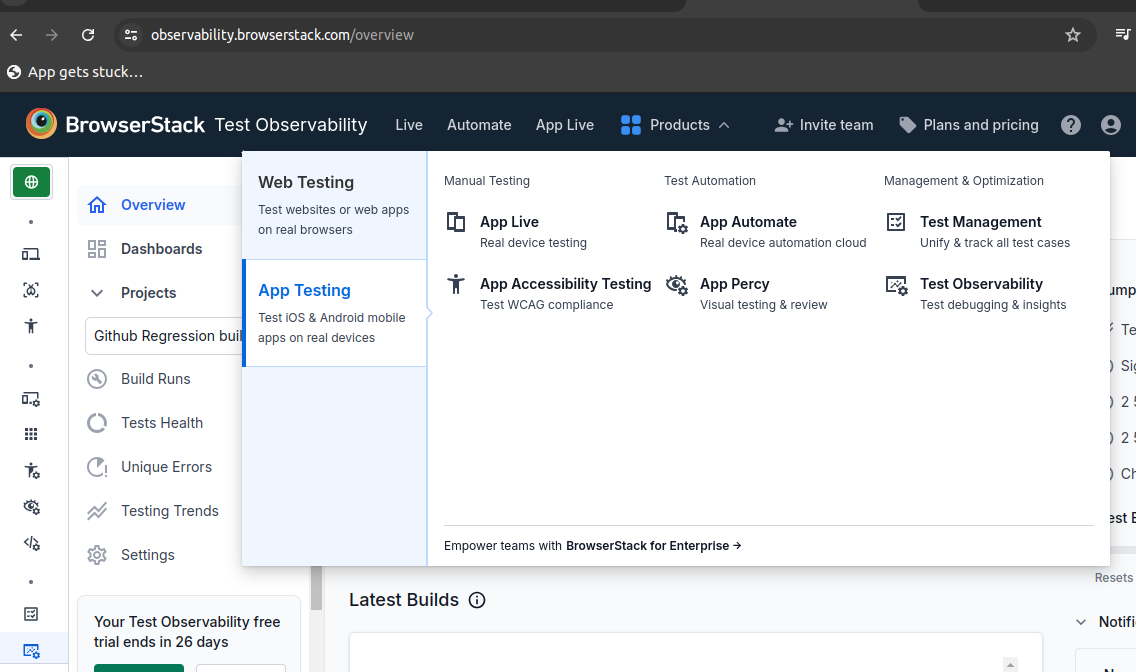
Imagine a testing environment where you don’t have to chase down specific devices or stress over every possible OS-browser combination. With BrowserStack, this becomes a reality offering instant access to a vast array of real devices and browsers directly in the cloud. No more manual device setup or compatibility headaches. Instead, simply log in and start testing websites and mobile applications across virtually any configuration available. It’s like having an entire device lab right at your fingertips, streamlining the testing process and elevating your team’s efficiency to new heights.
Key Benefits of Using BrowserStack
- Access real devices :- Get instant access to a range of real Windows, macOS, Android and iOS devices.This extensive range ensures that you can test your app on virtually any device your users might have, from the latest flagship phones to older models.
- Operating System :- Testing across different OS versions is crucial for ensuring compatibility.
- Browser Compatibility :- Test across new and older versions of Edge, Safari, Chrome, IE and Firefox.
- Integration and Automation :- Integrating BrowserStack with your existing CI/CD pipeline is straightforward. It supports integration with popular tools like Jenkins, GitHub, Travis CI and more enabling automated testing that fits seamlessly into your flow.
- Collaboration :- Collaborating with team members and stakeholders is made easy with BrowserStack. You can share test results, screenshots, and session recordings, facilitating faster issue resolution and alignment across teams.
Guidance for BrowserStack Setup
Setting up the Development Environment
First, we need to set up our development environment by installing the tools and dependencies to configure our IDE. Includes Appium, its a tool used to automate testing for mobile apps on both iOS and Android platforms.
Several things we need to consider and configure are:-
- Install Java Development Kit(JDK) : Appium requires Java so that we have to install the latest version of JDK on your Systems.
- Install Android SDK : To interact with Android devices and emulators, we need to install Android Software Development Kit (SDK). It provides the necessary tools,platform components etc for Android app development and testing.
- Setup Appium : Install Appium on your System. So you can download and install the Appium Desktop application. And make sure you have the latest stable version of Appium.
- Install IDE and Appium Client Libraries : Choose an IDE that suits your preferences, such as Intellij IDEA or Eclipse.Install the necessary plugins and dependencies for Appium testing .Additionally,install the required Appium client libraries for your chosen programming languages(eg: JAVA,PYTHON,JAVASCRIPT).
Configuring BrowserStack for Android Testing
Here we will focus on configuring BrowserStack for Android Testing.You’ll learn how to set up your BrowserStack account,define desired capabilities, and establish a connection with the BrowserStack devices cloud.
BrowserStack offers multiple tools, including App Automate and App Live, which allow you to test native and hybrid mobile applications on thousands of devices using the Appium automation framework.
For that the key requirements and steps involved are:-
- BrowserStack Account : First you have to Sign up for an account on BrowserStack Website

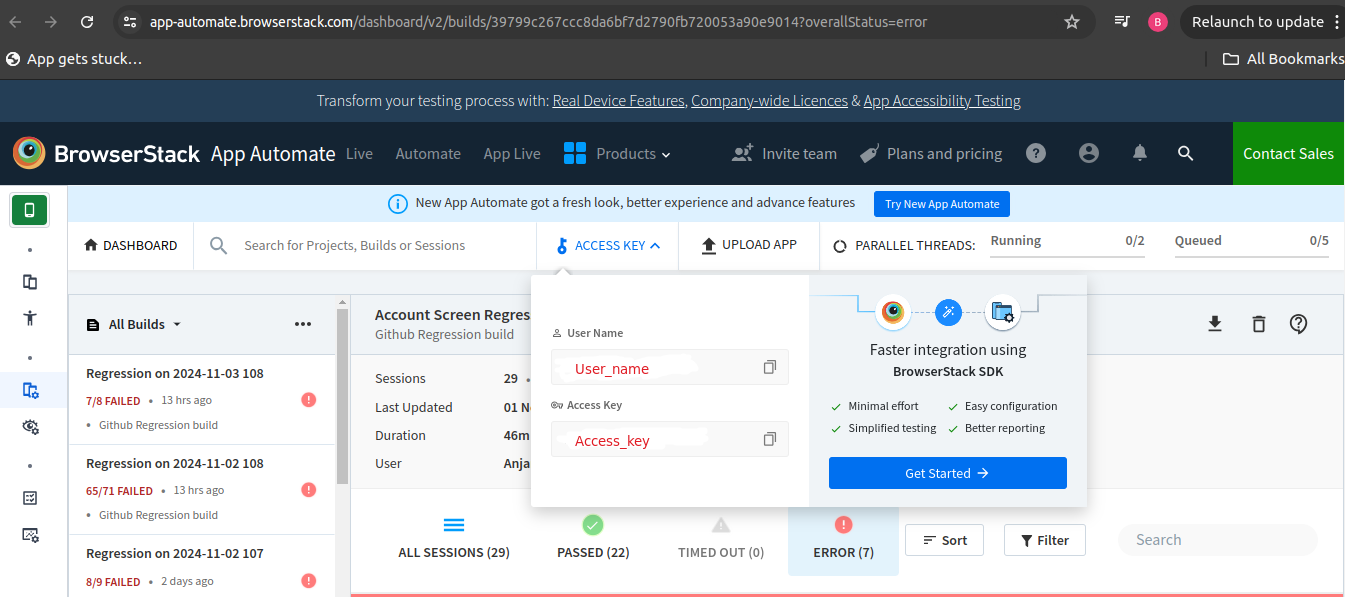
2. Obtain Username and Access Key : After Signing up, you will be provided with a unique username and access key. These credentials are required to establish a connection between your test script and the BrowserStack cloud. (To begin the setup, first you must register for a free trial or purchase a plan to obtain your access credentials .After completing those steps you will be redirecting to the following page)

3. Choose Desired Testing Environment : Determine the specific Android devices or emulators on which you want to run your tests.Identify the devices that match your target audience and test them. By using the following things,You can determine the devices on BrowserStack:
- Device Name
- Os Version
- Platform Name
4. Curl Command to Upload APK File on BrowserStack : The sample app on BrowserStack is uniquely identified by its App URL, which is encoded with bs://***********, as seen in the picture . therefore Once you do this curl call in the terminal, you will receive that url.
(To begin the setup, first you must register for a free trial or purchase a plan to obtain your access credentials .After completing those steps you will be redirecting to the following page)

Writing First Android Appium Test
In this Setup, You’ll gain insights into how to interact with elements,perform actions, and make assertions using Appium framework.
There are several steps that need to be considered and configured as follows:-
1.Setup your POM file:
You need to include certain Maven dependencies in your project.These dependencies provides the necessary libraries and tools to establish a connection with BrowserStack and execute your tests.Here are the main Maven dependencies required:
1.Selenium WebDriver : Dependency:- org.seleniumhq.selenium:selenium-java
   <dependency>
               <groupId>org.seleniumhq.selenium</groupId>
                <artifactId>selenium-java</artifactId>
                <version>4.8.1</version>
    </dependency>
Selenium WebDriver is used for automating browser interaction. It allows you to interact with web elements and perform actions on web pages.
2.Appium Java Client : Dependency:- io.appium:java-client
      <dependency>
                <groupId>io.appium</groupId>
                <artifactId>java-client</artifactId>
                <version>8.3.0</version>
       </dependency>
3.JUnit(optional) : Dependency:- org.JUnit
       <dependency>
                <groupId>junit</groupId>
                <artifactId>junit</artifactId>
                <version>4.13.2</version>
        </dependency>
4.Browser-stack : Dependency:- com.browserstack-BrowserStack-local-java
        <dependency>
              <groupId>com.browserstack</groupId>
              <artifactId>browserstack-local-java</artifactId>
              <version>1.0.6</version>
        </dependency>
2.Configure Appium Server:
Configure your Appium server to connect with BrowserStack. This involves setting the BrowserStack URL, username, and access key in the desired capabilities or Appium server configuration.
HashMap<String, Object> browserstackOptions = new HashMap<String, Object>();
       browserstackOptions.put(“userName”, “$UserName”);
       browserstackOptions.put(“accessKey”, “$AccessKey”);
       browserstackOptions.put(“buildName”, “$buildName”);
   URL remoteUrl = new URL(“http://hub.browserstack.com/wd/hub”);
3.Define Desired Capabilities:
Desired capabilities are a set of parameters that defines the testing configuration for your Appium tests. These include details such as the device name, platform version, browser name, orientation and other specific settings required for testing on BrowserStack.Ensure that you define the desired capabilities correctly based on your chosen devices and testing needs.
DesiredCapabilities desiredCapabilities = new DesiredCapabilities();
    desiredCapabilities.setCapabilities(“appium:devicesName” , “Google Pixel 7”);
    desiredCapabilities.setCapabilities(“appium:os_version” , “12.0”);
    desiredCapabilities.setCapabilities(“appium:app” , ”bs://436547657*****************”);
    desiredCapabilities.setCapabilities(“platformName” , ”Android”);
    desiredCapabilities.setCapabilities(“bstack:options” , browserstackOptions);
AndroidDriver driver = new AndroidDriver(remoteUrl,desiredCapabilities);
4.Test Script Setup:
Setup your test script to utilize BrowserStack’s capabilities. This process involves several steps, including initializing the Appium driver, interacting with app elements,writing assertions, and also handling waits.
For example, execute the signup() method in an Android app.
public static AndroidDriver driver;
public void signIn(String userName , String password) {
    wait.until(ExpectedConditions.visibilityOfElementLocated(TestUserName));
      driver.findElement(TestUserName).sendKeys(userName);
      driver.findElement(TestUserPassword).sendKeys(password);

   wait.until(ExpectedConditions.visibilityOfElementLocated(clickOnLoginButton)).click();
           if(signOutButton.isDisplayed()){
              System.out.printf(“User is Successfully SignIn”);
             }else {
               System.out.printf(“User is Not SignedIn”);
             Assert.fail();
               }
          }
Executing the test on BrowserStack
Once your test is ready, it’s time to execute it on the Browserstack platform. In this section, we’ll demonstrate how to effectively manage your Appium tests on real Android Devices or emulators provided by BrowserStack.
You can execute your test by simply entering the below maven command.
mvn test
When you run the above command, you will see the live execution on the terminal and because we are using BrowserStack, it will perform your test in interacting with the Browserstack.
Analyzing Test Results
After executing your tests, it’s crucial to analyze the results effectively. In this section,we’ll explore how to interpret the test reports generated by BrowserStack. You’ll learn how to identify test failures,investigate issues and extract valuable insights to improve the quality of your app.
Some key points to consider when analyzing test results in BrowserStack:
- Detailed Test Reports: BrowserStack generates comprehensive test reports that provide a wealth of information about the test execution. These reports include test status(pass/fail), execute time, screenshots, console logs, network logs, and devices-specific information.
- Screenshots and Visual Comparison: BrowserStack captures screenshots during test execution, allowing you to visually inspect the state of your app on different devices.Visual comparison helps ensure consistent UI/UX across various devices and screen sizes.
- Console Logs and Error Message: The console logs captured by the BrowserStack provide valuable insights into the test execution process.This information can help pinpoint the root cause of failures and assist in debugging and troubleshooting.
- Test Comparison and Regression Analysis: If you have multiple test to runs, use BrowserStack comparison features to analyze the differences in test results between runs.This allows you to identify any regressions or unexpected changes in your app’s behavior.
Conclusion
In this Blog, we’ve explored the powerful synergy between Appium and BrowserStack for Android app testing. By harnessing Appium’s robust automation capabilities and BrowserStack’s extensive device coverage, you’re equipped to ensure that your app delivers a seamless and reliable user experience across a wide range of Android devices and configurations.
Now it’s time to put these tools to work! Dive in, experiment, and see firsthand how these platforms can simplify your testing journey and elevate your app quality.
Till then Happy learning and Happy Automation!