Postman is a powerful tool for API automation, enabling developers to automate testing, integration, and monitoring of APIs. Paired with Newman, the command-line companion for Postman, automation capabilities can be significantly enhanced, simplifying the integration of API testing into CI/CD pipelines. Postman and Newman together provide a seamless experience for efficient and reliable API testing.
Create an Environment in Postman
Environments allow the use of variables like baseURL, apiKey, and authToken across multiple requests, making tests dynamic. Go to Manage Environments in Postman to create an environment. Here, we created the environment QA Environment and added the variables base_url.

Creating API collections
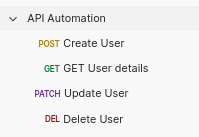
Collections is a feature on postman group related requests and tests together, allowing sharing of parameters and variables between each other. They also enable running all requests and tests together and performing chain tests if needed. In this example, we made a collection API Automation which includes POST, GET, PATCH and DELETE user.

Collection variables
Collection variables are variables that are specific to a particular collection. They are useful for storing values that need to be reused across multiple requests within the same collection. These variables are scoped at the collection level, meaning they are accessible to any requests, scripts, or folders within that collection. In this example, we added an Authorization token and userId.

Creating requests and writing tests
Postman simplifies creating and testing API requests, enabling seamless API behavior validation. To start, requests such as GET, POST, PATCH, or DELETE can be created by specifying the API endpoint, headers, and body (if required). Once the request is set up, Postman’s built-in scripting feature can be used to write tests in JavaScript (or other supported languages). In this example, the created requests includes tests written in JavaScript to validate status codes, response fields, and performance :
POST Create User request
The POST Create User request allows adding a user to the system. It includes a URL (e.g., base_url from the Environment variables), headers (e.g., token from the Collection variables), and a JSON body with user details like name, email, gender, and status.

pm.test("Validate status code", function()
{
    pm.response.to.have.status(201);
});

pm.test("Validate response data", function() {
    const jsonData = pm.response.json();
    pm.expect(jsonData.name).to.eql('Shahina');
    pm.expect(jsonData.email).to.eql('shahi13@gmail.com');
    pm.expect(jsonData.gender).to.eql('female');
    pm.expect(jsonData.status).to.eql('active');
    pm.collectionVariables.set("userId", jsonData.id.toString());
    pm.collectionVariables.set("name", jsonData.name);
    pm.collectionVariables.set("email", jsonData.email);
    pm.collectionVariables.set("gender", jsonData.gender);
});
GET User Details request
The GET User Details request retrieves a specific user’s information by passing the userId as a path parameter, dynamically fetched from collection variables in the same base URL and uses the same token from Collection variables.

pm.test("Validate status code", function()
{
    pm.response.to.have.status(200);
});

pm.test("Validate response data", function() {
    const jsonData = pm.response.json();
    const userId = pm.collectionVariables.get("userId")
    const name = pm.collectionVariables.get("name")
    const email = pm.collectionVariables.get("email")
    const gender = pm.collectionVariables.get("gender")
    pm.expect(jsonData.id.toString()).to.be.eql(userId);
    pm.expect(jsonData.name).to.eql(name);
    pm.expect(jsonData.email).to.eql(email);
    pm.expect(jsonData.gender).to.eql(gender);
});
PATCH Update User Details request
The PATCH Update User Details request allows updating specific user information, such as name, email, or status with same base_url with userId as a parmeter that fetched from Collection variables and same token.

pm.test("validate status code", function () {
  pm.response.to.have.status(200);
});
pm.test("Validate response data", function() {
  const jsonData = pm.response.json();
  pm.expect(jsonData.name).to.equal('Shai');
});
DELETE User delete request
The DELETE User delete request is used to remove a user’s information from the system by targeting the user’s unique ID. The request is sent to the same base_url, with the userId passed as a parameter from the collection.

pm.test("Validate status code", function() {
    pm.response.to.have.status(204);
});
Alternatively, data can be stored in collection variables to reuse across tests for improved consistency and maintainability. This approach simplifies updates and enhances the readability of your test scripts.
Collection Runner
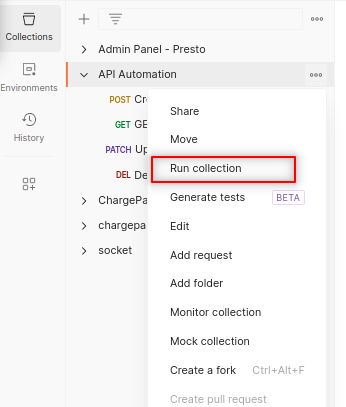
Postman offers a built-in feature called Collection Runner, which allows a collection of requests to be run automatically, saving time and effort in manual testing. This feature is particularly helpful for testing multiple endpoints or running a series of requests with varying data inputs.
Navigate to the desired collection to run, then click on the Runner button at the top right of the collection view.

In the Collection Runner window, all the requests within the collection are automatically selected. Once the settings are configured, clicking the Run button will prompt Postman to execute all the requests in sequence, providing detailed logs of each request’s response. This makes Collection Runner a powerful tool for automating API tests and ensuring consistency in the testing process.


Running API Automation Seamlessly with Newman
Newman, the command-line companion for Postman, empowers developers to automate API testing effortlessly. It allows the execution of Postman collections, validate responses, and generate detailed reports, all from the terminal. Perfect for CI/CD integration, Newman ensures reliable, scalable, and efficient API workflows.
Installing Newman and running the collection using Newman
Once Node.js is installed, Newman can be installed globally using npm (Node’s package manager). Open the terminal and run the following command:
npm install -g newmanBefore running a collection in Newman, it needs to be exported from Postman. First, open the collection to run, then click Export from the Collection view. Choose the appropriate collection format (v2.1 or v2) and click Export to save the collection file to your computer. This exported file will be used to execute the collection in Newman via the command line. If the collection uses environment variables, the environment can be exported as well. (Alternatively, the collection can be accessed via a Postman API key or by using a shared public link without exporting the collection.)
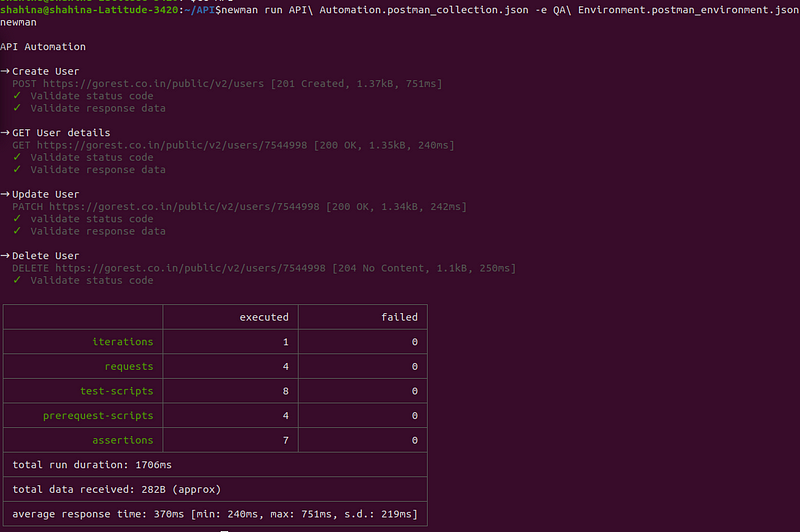
In this example, exported both API Automation Collection and QA Environment and passed them to Newman like:
newman run API\ Automation.postman_collection.json -e QA\ Environment.postman_environment.jsonNewman will execute the collection and provide results directly in the terminal and can see detailed logs, including request responses and status codes.

Newman also supports generating detailed HTML reports by integrating community-created reporters like newman-reporter-htmlextra. These reports provide comprehensive insights, including test results, request/response details, and failure highlights, all in an easy-to-read format.
Conclusion
API automation using Postman and Newman provides an efficient, scalable solution for testing APIs. Postman simplifies creating and testing API requests with its user-friendly interface, while Newman allows seamless integration into CI/CD pipelines for automated execution. Together, they ensure reliable, consistent, and rapid validation of APIs, helping teams deliver high-quality software faster.
Happy Automation!